Leftover Almond Pulp Lunch Box Crackers

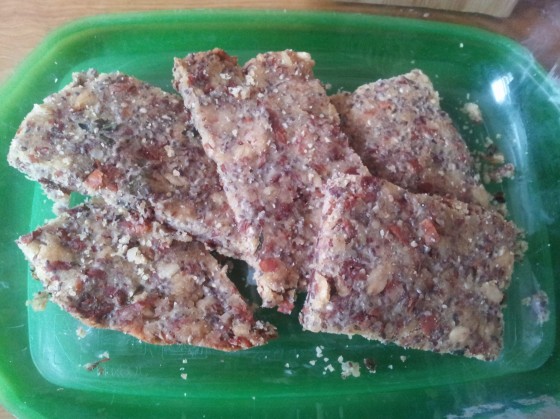
crackersAgain, my photo’s are embarrassing compared to the food porn that is all over the blogging scene. But, alas, I don’t have time to set up a photo shoot in the kitchen and take a million shots, so you will just have to trust that these look and taste good!

I have been making my own almond milk recently and needed to find a use for all of the almond pulp that was leftover. I had saved a few recipes but not got round to trying them as they were too complicated or required special ingredients I didn’t have. I needed something quick and easy that was useful to have in stock instead of just making more food for the sake of it (which would be the case with almond cookies for example!)

I followed a recipe for almond crackers but the mixture was crumbly and too oily, so I added my own bits including a chia egg to hold it all together, hoped for the best, and came out with these more-ish, nutritious snacks. Not crunchy like crackers, more like oat cake texture, but great to spread with avocado, dip in humus or pack in your child’s snack box.

As I made the recipe up for the most part I have guesstimated quantities. The final mixture held together fairly well but it doesn’t need to be very dough-like. It had some moisture but didn’t stick to my hands. Just make sure you press it down firmly into the baking tray and it shouldn’t fall to pieces! You can try all sorts of flavours, just swap the herbs, add seeds, olives, sun dried tomatoes whatever you fancy!

Ingredients:

1 cup roughly almond pulp (as I use a juice my pulp is already quite dry, you might need less oil if your pulp is wetter)

3 tablespoons olive oil

1/3 cup rolled oats

1/3 cup chickpea flour

1 tablespoon chia seeds + 3 tablespoons water

Pinch of salt

4 sprigs of thyme, leaves only

1/2 teaspoon garlic granules or fresh, minced garlic

Method:

Start by making a chia egg (you could also use flax seeds here) by combinging chia seeds and water and setting aside for a few minutes.

Mix all of the ingredients together, adding the flour and oats a bit at a time and using the chia egg last to combine and hold together. If the mixture is too wet then add a little more flour or oats or both.

Press mixture into a small oven proof dish or baking tray. You want the crackers to be about 1/4 cm thick.

Bake in pre-heated oven at 180 degrees Celsius for 15-20 minutes or until the edges start to turn darker brown.

Cut into squares and leave to cool before moving to a different container.

Vegan Coleslaw

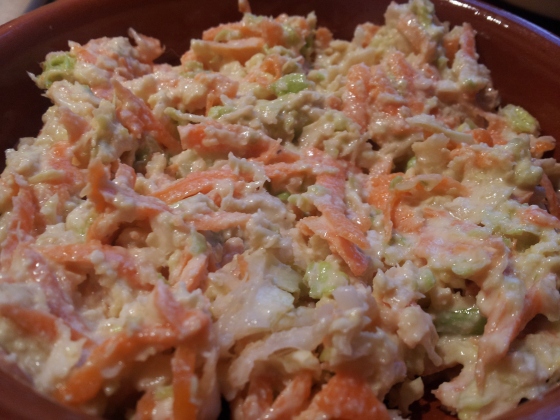
20141030_162557Poppy is currently eating this for her dinner. She does have it on top of sweet potato but all she is interested in is the coleslaw! I don’t blame her, it is tasty stuff. Like most of my recipes you can adapt it according to your personal preferences. I usually add shredded kale but we had run out today. You can add more cashew nuts to the dressing if you want it to be thicker, the more you add the thicker it will be, but you don’t need them at all if you prefer, you could try adding tahini for a bit of thickness or nothing if you prefer a very runny dressing, the flavour will still be there. We eat this with salads, in wraps, sandwiches, on top of a burger, in a buffet, alongside a chilli…a delicious way to add some veggies to your meal.

Veggie Ingredients:

2 grated carrots

1/2 grated cabbage

4 spring onions, chopped

Large handful kale, processed in blender to shred (optional)

For the dressing:

1/2 cup cold pressed olive oil

2 tablespoons apple cider vinegar

1/4 cup water (you can add more if it is too thick)

1/2 cup cashews, ideally soaked for 4 hours (or more)

2 cloves garlic

1 tablespoon maple syrup

Squeeze of lemon juice

Pinch of salt

Simply blend all of the dressing ingredients and add the the carrot and cabbage mixture. Taste and add more vinegar, maple syrup, garlic or salt according to your personal taste. This recipe will serve about 4. 

VegFest London 2014

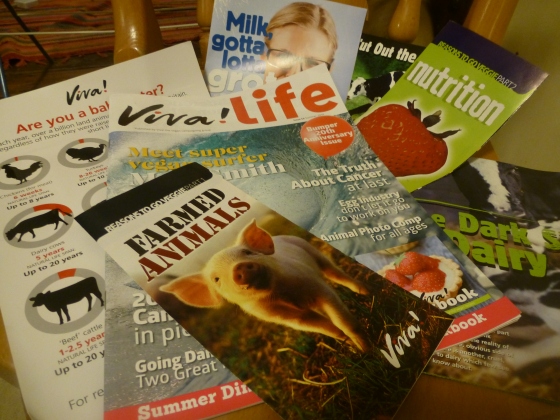
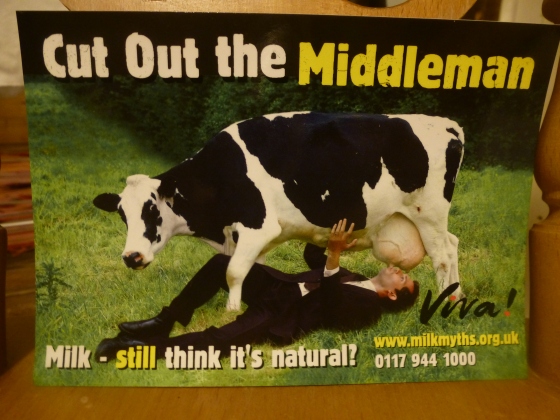
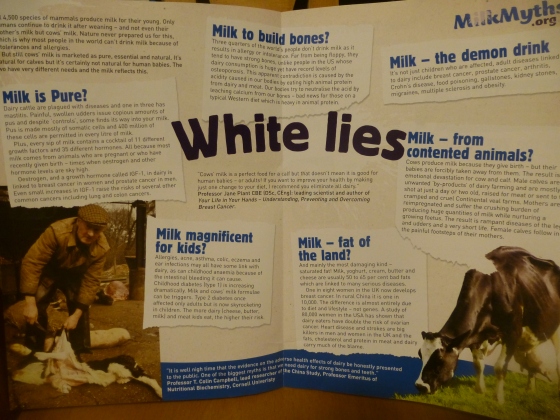
P1040599At the end of September a friend and I went to VegFest in London (with the babies!) It was busier than I expected, which was difficult with the babies, but I am not suprised because the event had a lot to offer. Whether you are interested in vegetarianism, veganism, you are dairy-free or just interested in healthier eating or greener living, it was a great place for information, tasters and discussions. In fact the less you know about veganism the more you will gain from the event! I will definitely go again next year, when I can hopefully leave Poppy behind! Because there were so many talks, demonstrations and workshops we would have loved to stay for, but the babies were getting restless. We managed to pick up loads of leaflets though, all reaffirming my reasons for going (mostly) vegan and motivating me to try harder! As for the dairy debate, all I can say is that I am so glad we no longer consume that junk, and I can’t believe how brain washed people are into believing it is good for them! I will put some links at the end of this post if you want to educate yourself further on this matter.
P1040598
P1040596
P1040597
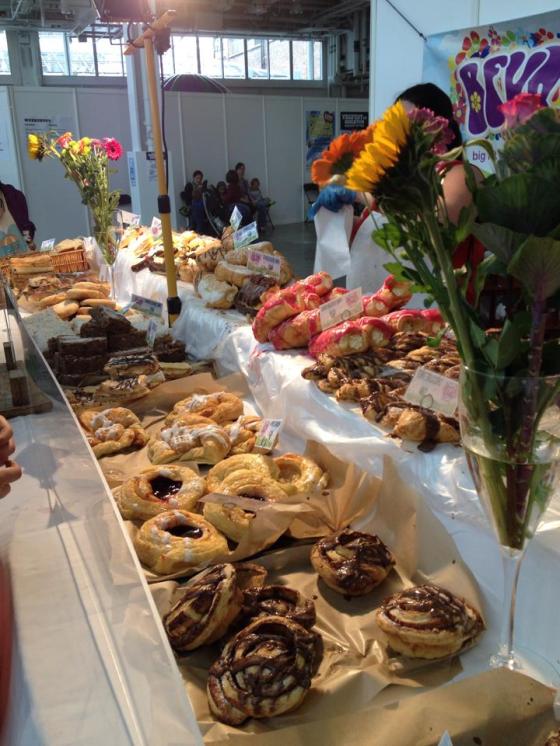
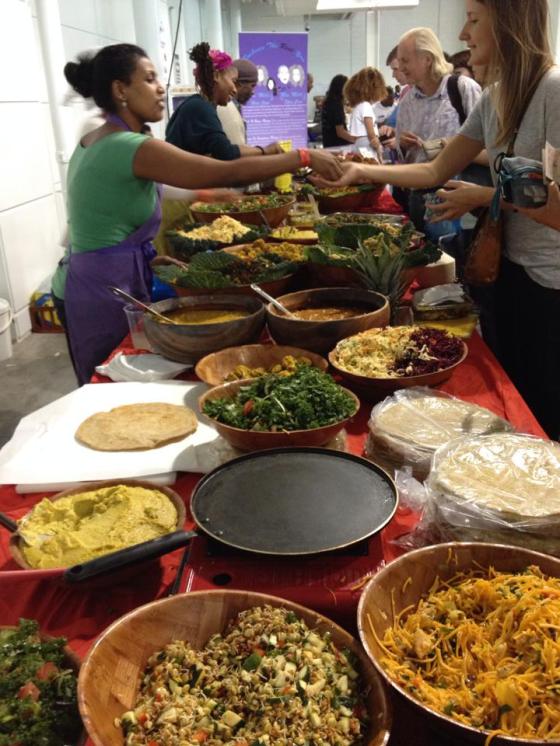
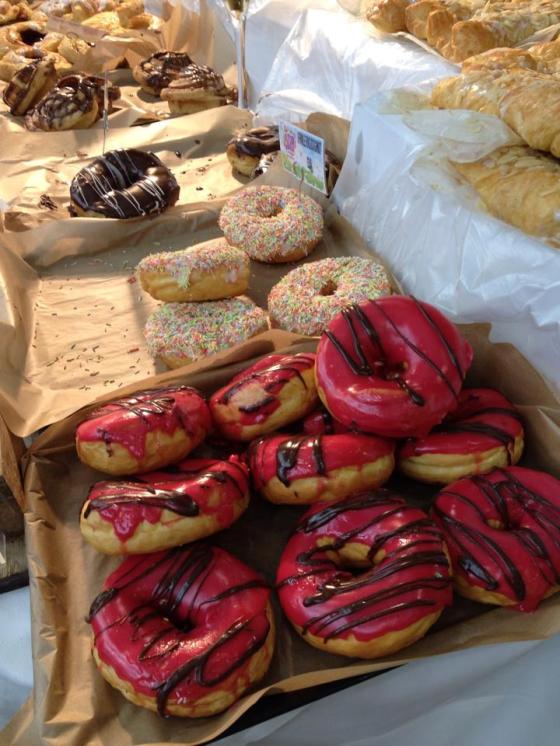
For those of you who haven’t got a clue what vegan’s eat then take a look at the photo’s below and know that it is not just slop or lettuce leaves! Granted, the doughnuts are not going to be the healthiest choice, but my point is that you don’t HAVE to be health obsessed to make positive changes to your diet, and you can still have a treat when the mood strikes. On the other hand, healthy choices can be delicious too! We had a wrap filled with all sorts of healthy goodies for lunch. I was completely stuffed and yet could probably have devoured another it was beyond delicious. The choice of food was amazing, from chocolate to cheesecake, burgers to burritos. If you think veganism is restrictive, think again!
vegfest2
vegfest1
There were also stalls with beauty products, clothing, petitions and more. The children’s area looked like good fun with cooking classes and other activities, and there was a cinema area that was showing informative films. And it wasn’t limited to vegetables! There were also discussions on raw food diets, lots of information about healthy and not so healthy fats, sugar, juicing and even green products such as cloth maternity pads! Overall it was well organised, despite the queue to get in and the broken lift fiasco, and I would have loved to have spent more time there. However, I don’t think I would want to take kids again as it was too busy to focus on everything and them! For the price of the tickets it was well worth a trip, although be warned, you could easily spend a fortune on all the tempting stalls.
vegfest3
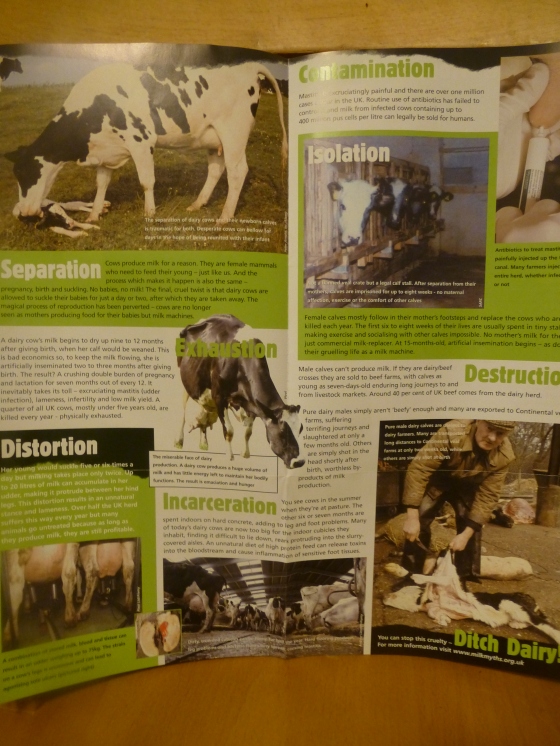
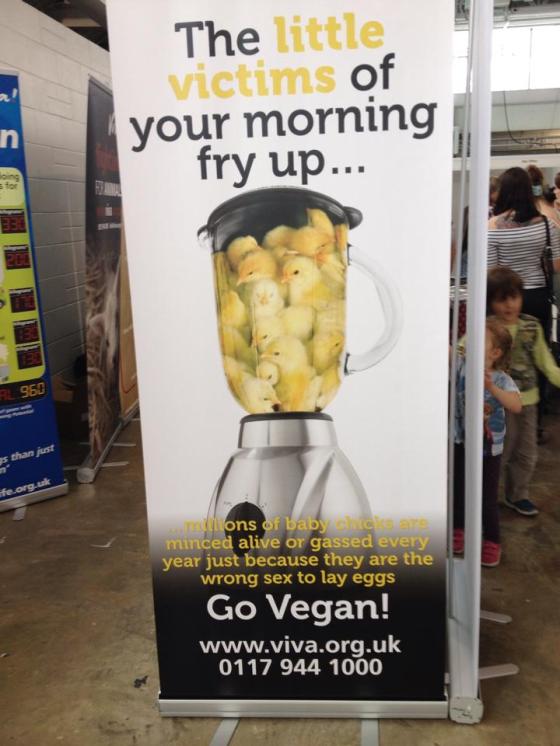
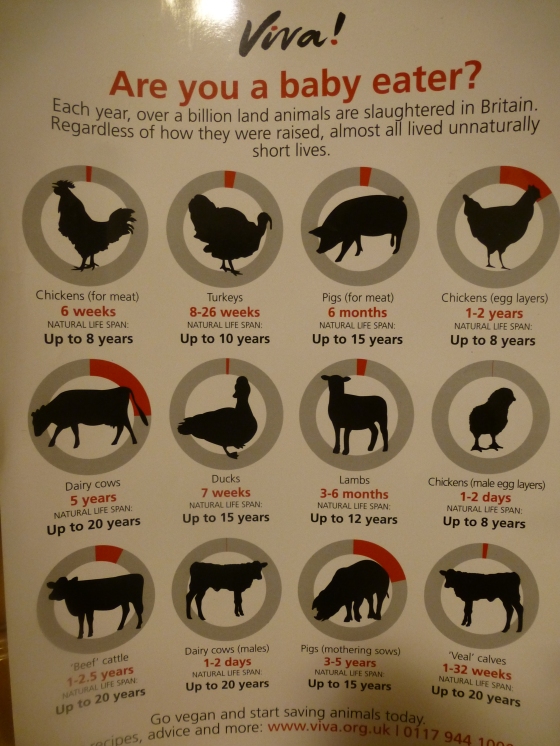
Some of the posters and flyers were eye-opening. I initially chose to cut down on meat for health reasons but I can’t deny that the facts on farming make me feel pretty sick and they do make me think twice if I ever get a meaty craving. It is too easy for us to detach ourselves from the reality, when we buy our meat all neatly packaged up in the supermarket with pictures of happy animals on the front. We are allowing outrageous torture to animals and damaging our environment at the same time. If you do eat meat, at least know exactly where it comes from and how the animals are treated. But even organic doesn’t always mean cruelty free due to the very fact that farming is a business and therefore certain procedures have to take place in order to meet demand, and don’t be fooled by the words ‘free-range’ either.
vegfest4
P1040594
There is loads of information out there on the health benefits of vegetarianism, veganism and going dairy-free AND it is better for the environment. It makes me laugh when people think that vegan’s don’t get enough nutrients. Sure, there will be unhealthy vegan’s out there, but if you are following a plant based diet with plenty of variety, some raw foods, good fats and natural sources of protein…you are bound to be getting exactly what you need. People often wonder if Poppy will be bought up as a vegan, as if they are worried that she won’t grow properly or have lifelong problems because I am so irresponsible I am depriving her of protein! But I am not worried in the slightest because I know that everything she needs is available in the fresh, wholesome foods we eat. Most of the information we are given about dietary requirements are inaccurate and even worrying. The popular eat well plate for example has a small section suggesting that we need some foods high in sugar and fats (with photo’s of fizzy drinks and biscuits). No one in the world NEEDS these sorts of processed foods, ESPECIALLY not a baby! Of course you can enjoy them in moderation if you choose, but this information is given out in schools which I find irresponsible and misleading for parents who don’t know any better. I have taken Poppy’s health into my own hands so that I can be absolutely sure she only gets the best.
P1040537 They weren’t as energetic on the journey home!

For more info take a look at the following links:

http://www.viva.org.uk
http://www.milkmyths.org.uk
http://www.vegansociety.com/try-vegan/why-go-vegan
http://www.grownathomewithlove.wordpress.com/tag/food-intolerances/
http://www.peta.org/issues/animals-used-for-food/factory-farming/cows/dairy-industry/
http://www.vegsoc.org/
http://www.govegan.org.uk/
http://www.london.vegfest.co.uk/

Gluten-free, sugar free, vegan breakfast muffins

photo-3

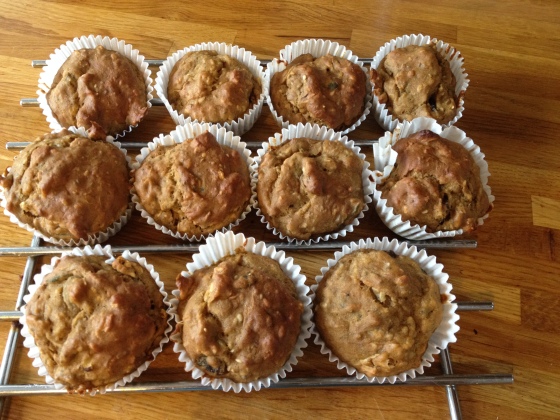
Sometimes I just fancy something new for breakfast, and sometimes that ends in disaster. Especially when it comes to baking as I’m no good at guessing quantities and figuring out how to bind ingredients together or make sure it rises. But much to my surprise my recent experiments with breakfast muffins have turned out very well. I looked at a few recipes online, realised we had none of the ingredients in the cupboard, and made something up myself. I used flax eggs and banana to bind the mixture, although you could also use a vegan egg replacer instead of the flaxseed mix (the banana may even be enough but I felt safer using something I knew would definitely work!) You can add anything you like, such as dried apricots, cacao nibs or nuts, and adjust the sweetness with your choice of natural vegan sweetener. I like the fact that it feels like you are eating a cake but there is nothing naughty in there at all! They are also great for when you need breakfast on the go or something to grab when you first wake up, which is why I have just made a fresh batch for our holiday. I try to be prepared so that we are not tempted to eat out too often which will no doubt be unhealthy and expensive (I have been baking bread and making soup today too!) These muffins are easy, tasty, great for little hands and full of goodness; perfect for baby led weaning as well as lunch boxes!

Ingredients:

3/4 cup chickpea flour

3/4 gluten-free self raising flour (I used doves farm)

1 teaspoon baking powder

1 teaspoon baking soda

1 teaspoon cinnamon

1/2 teaspoon nutmeg

2 tablespoons milled flaxseed with 6 tablespoons non-dairy milk

3 bananas, the riper the better!

1/3 cup olive oil or coconut oil (melted)

1 tablespoon molasses

1/2 cup sweetener (agave, maple syrup, honey if non-vegan)

1 apple, grated

Small piece of ginger, grated

Mixed seeds of your choice (I used, chia, pumpkin, sunflower, golden flaxseed)

Handful desiccated coconut

Handful chopped dates

Method:

Mix flours, baking powder, baking soda, cinnamon and nutmeg in a bowl.

Prepare your flax eggs by combining the milled flaxseed and non-dairy milk and setting aside for a couple of minutes for the seeds to absorb the liquid.

Meanwhile, mash the bananas and add them to the flour mixture.

Add the flax eggs and combine well.

Stir in the oil, sweetener and molasses, followed by the rest of the ingredients.

Spoon into cupcake cases and bake in the oven at 180 degrees for around 20 minutes, or until they start to turn golden brown.

Leave to cool before serving with a cup of tea!

Enjoy!

Cocoa-nut bites

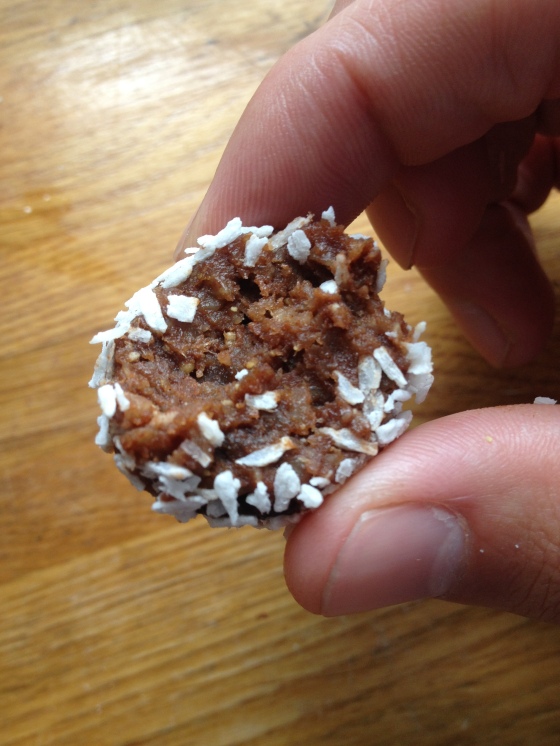
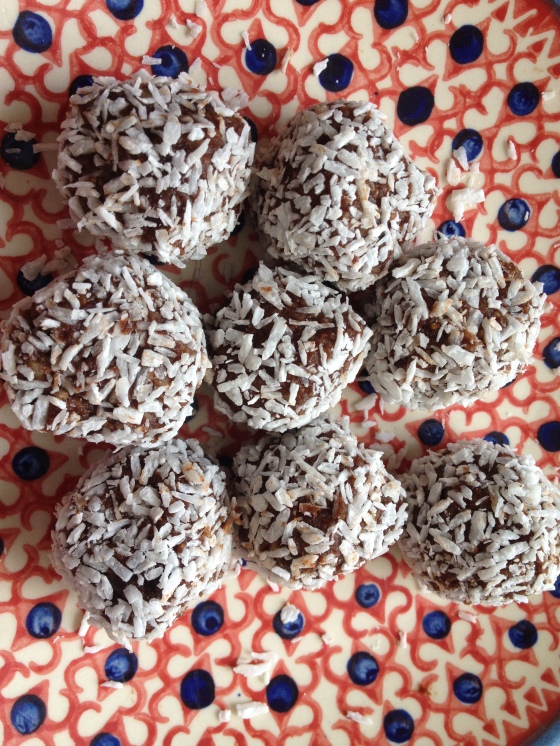
photo 2-1There are hundreds of these delightful little balls circling the blogging scene! I usually just make them up as I go along, but this one was particularly good. I haven’t been updating you on my sugar free challenge at all! But because of little lifesavers such as these nutritious snacks, I have managed fairly well. It hasn’t been as hard as I imagined, but then again we haven’t cut out natural sugars, so I can still satisfy my sweet cravings. Although many people say sugar is sugar, processed or not, I have to disagree. The foods that I get my sweet fixes from have so many health benefits that far outweigh the sugar content, and the extra goodness in them helps your body to process the sugar more efficiently anyway. I do feel better as a result of the challenge, with no more energy dips mid afternoon. I slipped up yesterday when I was testing a brownie recipe for the party this weekend, and today I have been feeling so lethargic! The other girls are doing great too and the online food diary has helped us to share ideas and really evaluate what we are putting into our bodies. I have realised that I really don’t snack as much as I thought! Michelle has lost a heap of weight and we have both said we want to make it a more long term change. I am also pleased that I have managed to, pretty much, cut out all processed bread (and haven’t eaten anything else processed the entire time!) and am now considering asking for a bread maker for Christmas!

If you have ever thought about going sugar free you should definitely try it. If you are happy to eat natural sugars in fruit, honey and maple syrup, for example, then you may find it is a piece of *sugar free* cake!

So to get you started here is a quick recipe for those moments when you just need a treat:

Ingredients:

1 1/2 cup soaked cashews

2-3 cup soaked dates

2 tablespoons cocoa powder

1 tablespoon coconut oil

Handful raisins

Desiccated coconut to coat balls in

Method:

Puree or blend your dates, cashews and coconut oil (I used my juicer to do this which makes them much smoother than blending, but either works ok) If the mix seems too crumbly add more dates. It should be sticky, holding together easily but not wet.

Put mixture in a bowl and stir in cocoa powder and raisins until mixed well. You can add more or less cocoa depending on how chocolatey you want them.

Roll into bite sized balls and then roll through the desicated coconut.

Refrigerate for an hour before serving (unless you are desperate to eat them straight away, but they really are better after being in the fridge!)

Store them in an airtight container and pack them in a picnic, in your child’s lunch box, for a long journey. You could even put them in a pretty box and give them as a gift…or just demolish them all whilst watching your favourite tv!

Enjoy!
photo 1

Vegan banana pancakes

10632799_10152640267739556_4853630784915982448_n

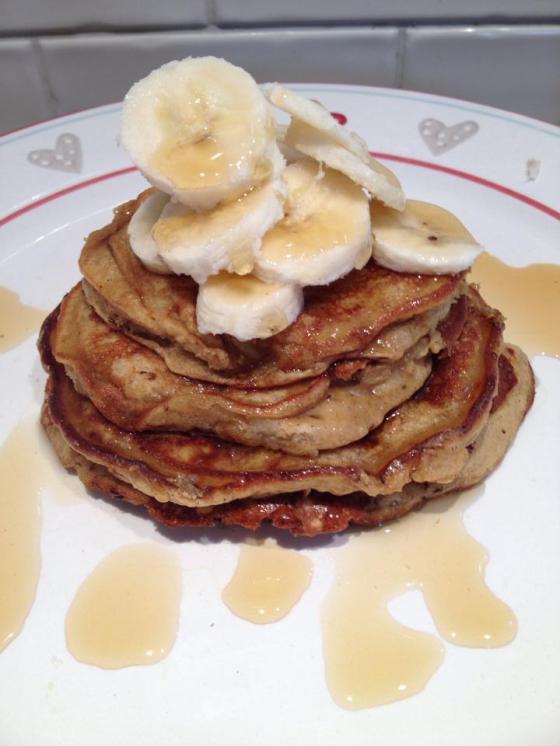
These pancakes were our breakfast on bank holiday Monday, a little treat (but a healthy one!), when there was nothing else in the house. They are so simple and very tasty with no sugar whatsoever. The chickpea flour provides protein and we all know that banana’s are good for us! Serve them with whatever you fancy, we used more banana and maple syrup. I’ll definitely be making these again and again!

Ingredients (to make the amount shown in pic):

1 small mashed banana
1/2 cup chickpea flour
1/4 teaspoon cinnamon
1/4 teaspoon baking soda
1/4-1/3 cup water

Method:

In a mixing bowl combine the mashed banana, chickpea flour, cinnamon, baking soda and 1/4 cup water and mix.
Add more water if necessary to get the consistency somewhere between thick-runny and runny.

Preheat a non-stick pan over medium heat. I used a very small amount of vegan spread in the pan to stop them sticking.

Scoop about 1/4 cup batter into the pan for each pancake. (Notice how mine got smaller at the top?! I would use just less than 1/4 cup if you want a stack like this and you want them to be the same size!)

Cook on one side until the top is bubbly, then flip and cook for about another minute. The pancakes should be browned on both sides but nice and cakey! 

Enjoy! 

Raw Vegan Cheesecake

10645264_10152635780039556_1892611123386451645_n

So at the start of my sugar free challenge what better than a sugar free cheesecake to get me through my sweet cravings?! 

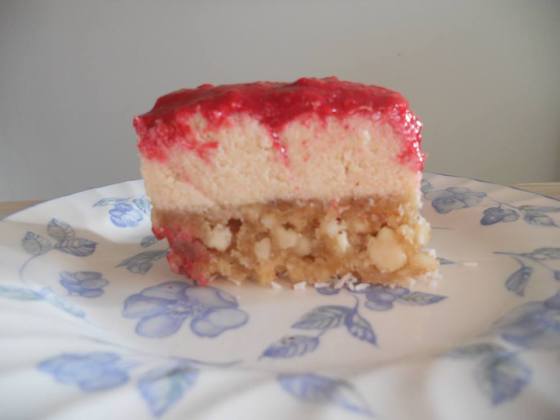
I took this recipe from http://www.therawtarian.com and it was a huge success. My Mum loved it (non-vegan) and I have loads left over for tomorrow which I know will please Tim. It wasn’t a perfect replacement for the cheesecake you might be used to, but I think it was nicer, and far healthier! It also could have been because I used maple syrup which has a distinct flavour, and I didn’t use a high speed blender. The base was quite crunchy and textured, but we really liked it like that. 

I did find that there wasn’t quite enough base mixture to cover a normal cheesecake dish, and so I used a smaller square pyrex dish, but then found there was too much ‘cheese’ mixture, making the layers quite thick in the smaller dish. It just meant we had smaller slices as it is quite rich, but we still both managed to have 2 of them! 

I will be trying this again with different fruit combo’s and think it could also work great with crumbled diary free ginger biscuits as the base and pineapple on top, for when the sugar free month is over. So here it is, simple and suprisingly healthy cheesecake! 

Ingredients:

Base:

1 1/2 cups macadamia nuts

1/2 cup dates (soaked over night to soften)

1/4 cup desiccated coconut

Pinch of salt

Cashew cheese filling:

3 cups cashews (I soaked mine over night to activate them and soften them)

3/4 cup lemon juice

3/4 cup agave/honey (I used maple syrup and honey)

1 tbsp pure vanilla extract

Water if you need to blend, I didn’t need any but use as little as possible

Topping:

2 cups frozen strawberries (I used raspberries!) 

1/2 cup dates (softened over night) 

Method:

Sprinkle your dish with the coconut and set aside

Using a high speed food processor, blend your macadamia nuts and dates until they are well processed but still airy. 

Press the nut mixture to the bottom of your dish (over the coconut which will stop it from sticking)

Blend all of your cashew cheese filling ingredients until smooth and pour on top of the nut base. 

Place in the freezer whilst you make your topping (the original recipe said an hour but I skipped this part completely and it still worked fine.)

Blend your fruit and dates in a high speed blender until smooth. It should look like a sorbet! Pour on top of the cheese filling and place back in the freezer, or the fridge like I did, until it reaches the desired consistency. The recipe says 5 hours in the freezer but I only put mine in the fridge for about 3 hours and it was perfect, the cheese had firmed up nicely.)

Mum left hers out of the fridge for a while before eating to take the chill off but I had mine straight away, your choice!  

Enjoy, guilt free! 

Thanks to http://www.therawtarian.com/raw-cheesecake-recipe for an amazing recipe!

Chickpea Tagine

Root-Vegetable-Tagine

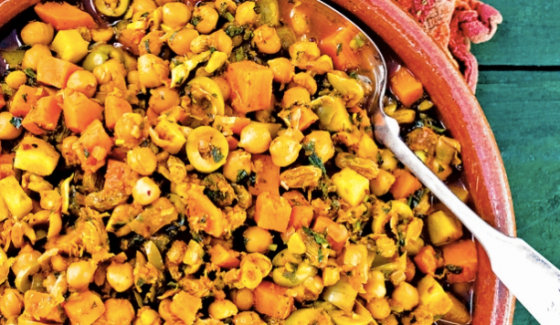
You may already know that we are a little obsessed with this recipe. In fact it was the first meal we cooked when we had decided to give veganism a go, and it was so good that we didn’t think we would ever be tempted to eat meat again! These days we are ‘chegan’s’; a name I heard somewhere that means vegans who cheat. Everything I cook at home is vegan, but if we are invited to a social event, we would rather just join in and eat what everyone else is eating to make life easier and ensure our social life doesn’t die out. I have also found it really difficult eating in restaurants, as a lot of the vegetarian options still contain cheese, so I often just opt for something with meat in order to avoid dairy. It is early days, but I think overall we are doing pretty well. 

Anyway, back to the tagine. This recipe has been adapted ever so slightly from one in our ‘Crazy Sexy Kitchen’ recipe book by Kris Carr. It is really delicious and healthy, and although it seems like a lot of ingredients, I now kow the recipe off by heart and it is easy. Try not to skip any of the flavour-y (it’s a word) ingredients as the overall taste is amazing! I once ran out of cumin seeds and discovered that these are an essential part of the dish!

You can, however, use any root veggies you like. For some reason I am always drawn to orange veg for this dish! I make my own tomato paste for this recipe, so I will start with that.

Tomato paste:

8 sun dried tomatoes

1 large tomato

1/4 red pepper

2 cloves garlic

1 tsp turmeric

1 tsp cinnamon 

1/2 tsp black pepper

Blitz and set aside.

Chickpea Tagine:

1 tbsp. cumin seeds 

1 tbsp. ground coriander

3 tbsps. olive oil

1 medium white onion, diced

2 cloves garlic

Your pre-made tomato paste

1 pint (ish) vegetable bouillon

3 large carrots peeled and diced

2 sweet potatoes, peeled and diced

1/2 butternut squash

1/4 jar pitted and chopped green olives

400g carton of chickpeas, drained and rinsed

1 jar artichokes (optional but tasty)

Zest of 1 lemon

Large handful raisins

3 tablespoons chopped parsley, plus some to serve

3 tablespoons chopped coriander, plus some to serve

(The original recipe also had mint, but we don’t usually buy this so I leave it out)

Method:

1. Toast cumin seeds and coriander in a pan until aromatic. Once toasted, add to your tomato paste and mix in. 

2. In a large heavy-bottom shallow pot or deep skillet (cast iron works best) on medium heat, add oil, onions and garlic. Cook until onions are translucent and golden, stirring continuously for about 4 minutes.

3. Reduce heat to medium-low, add the tomato paste and all of your root veggies (not the chickpeas), coating them in the paste.

4. Add the vegetable bouillon, cover and simmer for about 25 minutes, or until the veggies are tender. 

5. Add the olives, chickpeas, artichokes, lemon zest and raisins. Continue simmering for about 5 minutes. 

6. Add parsley and coriander and season with salt and pepper if desired. 

7. Garnish with sliced red chili and fresh herbs if desired.

I have just eaten a huge bowl of this! It is also one of the only meals that keeps Poppy’s attention for longer than 5 minutes. She picks out the chickpeas and eats them one by one! And today she had a go at the carrot and sweet potato too!

Enjoy!

Spelt Tortilla wraps and Vegan Cashew ‘Mayo’

photo 1-1

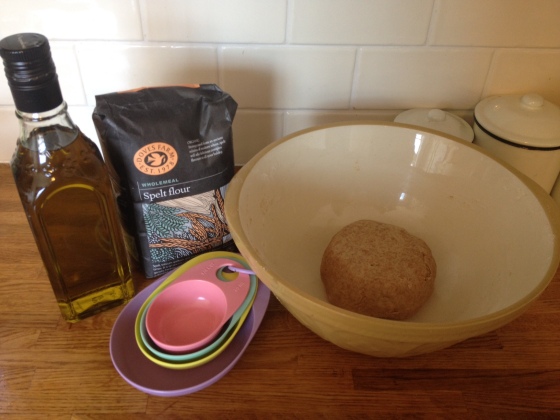
I am desperately trying to cut down on the amount of processed bread and the like in our house, and especially don’t want to give it to Poppy, so I have been experimenting with spelt flour. I did make a lovely loaf a week or so ago but I really don’t have time to be doing that very often. Then I discovered a delicious recipe for home made tortilla wraps, although it took a little preparation as it had to sit for 1 1/2 hours. The result was great though and the recipe is here (I recently bought some measuring cups because every recipe I fine seems to use cups and converting them has always freaked me out!)

photo 2-1

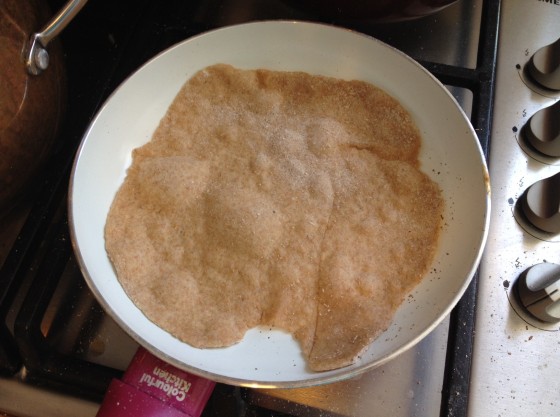
Today I tried a slightly different recipe, no salt and no waiting (well, 15 minutes, but that’s no biggie). They still tasted great, so fresh and way better than shop bought, and the recipe is just so easy and quick. I would say the others were a teeny weeny bit better on the texture and taste front, but to save an hour I am more than happy to stick with these, and I can see them becoming a very regular thing in our house.

photo 3

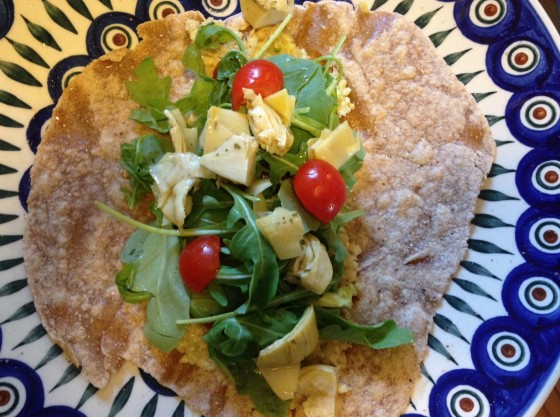
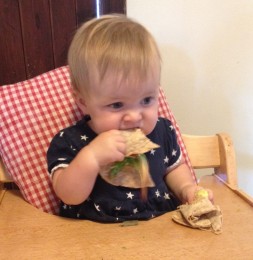
We spread them with delicious cashew nut vegan mayo, because I am also cutting out processed ‘extras’ that I add to my fresh, healthy meals, making it feel like I am undoing all the goodness! It doesn’t taste that much like real mayo, but it can be used in the same way, it is ten times more delicious and very healthy! Mine turns out quite coarse because I don’t have an all singing food processor, but I like it that way. We packed the wraps with salad and enjoyed a very filling lunch. Poppy was impressed too! Here are both of the recipes, for the wraps and the mayo!

photo 4-4

Spelt Tortilla Wraps:

Ingredients:

2 1/4 cups spelt flour
3 tablespoons olive oil or coconut oil
1/2 cup plus 4 tablespoons warm water

Method:

Mix the flour and oil together.
Add the water, mix and then form into a ball.
Leave for 15 minutes before breaking bits off and rolling into balls.
Roll out each ball of dough until it is paper thin.
Place in a preheated frying pan (we didn’t need any oil in our ceramic coated pan, the hotter the pan the quicker they will cook) until they start to bubble. Turn over and cook for the same amount of time on the other side.

photo 1-2

Cashew Mayo:

Ingredients:

Large handful of cashew nuts
2 tablespoons apple cider vinegar
2 dates or other sweetener (honey, agave syrup, maple syrup)
1 clove garlic
5 tablespoons water (you can add more if it needs to be more creamy)
Pinch of salt (optional)

Method:

Blend all of the ingredients together and use as required!

photo 3-1